The drone uses a 2.4 Ghz frequency band for long remote control distance. Drone allows multiple flights at the same time without any interference. Users can use individual controls to fly the drones, while taking photos and videos using our App and your smartphone’s WiFi connection.
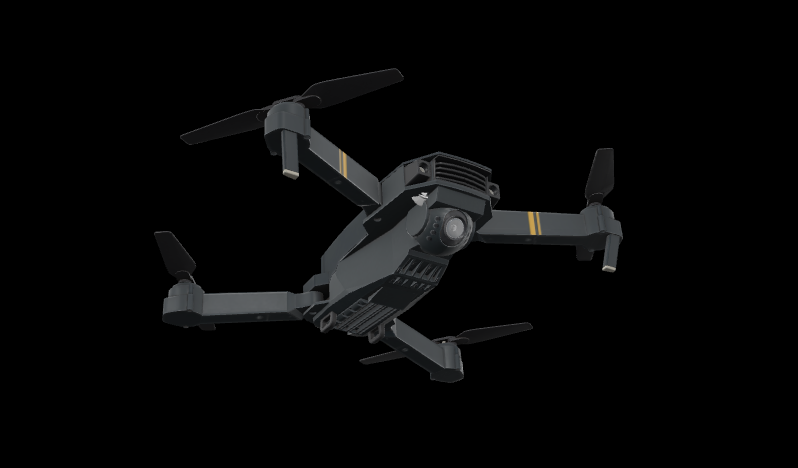
1) Upper Casing
2) Lover Casing
3) Propeller
4) Protective Guard
5) Arm
6) Battery
7) Motor
8) Camera
2x Backup Propellers
Keep the drone in sight during the flight and keep it away from barriers, high-tension cables, trees, and people.
Keep the drone in sight during the flight and keep it away from barriers, high-tension cables, trees, and people.
Keep the drone in sight during the flight and keep it away from barriers, high-tension cables, trees, and people.

Open the wings & assemble protective guards. Make sure the protective guards rest flat against the bottom of the wings.
Remove the lithium battery from the bottom of the drone and plug it into the included USB charging cable. When charging, the LED light will turn on. The red light will turn off when charging is complete. Let the battery charge 60 minutes on the first charge, and then charge time should be about 30 minutes going forward.
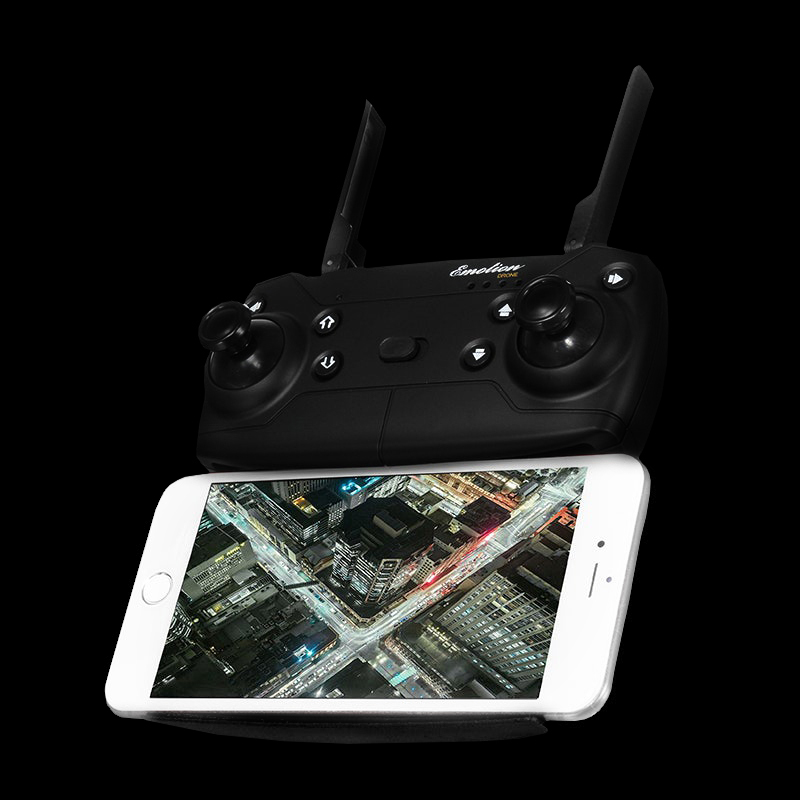
The included remote control takes 3 AA batteries (not included). Open the battery cover on the back of the remote and insert the batteries. When you’re done, press the power switch in the middle-front of the remote to power it up.
Insert the charged lithium battery into the back of your drone and power on both devices. The light on your drone should be flashing when it is on.
Push the left throttle stick up and then down to engage the drone. The light on the drone will go solid, showing that it is engaged with the remote control.
Once the drone is engaged, slowly pull the left throttle stick back until the drone begins to fly.
When you’re a new pilot, we recommend taking things slow while you get a feel for how your drone flies. When your drone first takes off, you might notice that it will drift backward, forward, left, or right.
Take your drone for a spin! Experiment with the two joysticks so that you become familiar with flying and stabilizing your drone. If your drone feels like it is going off course, use the fine-tuning buttons to adjust your drone’s calibration until it becomes steady.
Lastly, we’re going to teach you the best party trick you’ve ever seen. Fly your drone into an open area, at least 3 feet off the ground. Press the 360° button on top of your remote control. Next, push the right-joystick to the right or left…
1 Antenna
2 Left Side Fly Fine-tuning
3 Left Joystick
4 One-key Ascend
8 Forward Fine-tuning
9 Right Joystick
10 Left Joystick
11 Headless Mode
5 One-key Landing
6 Power Switch
7 Backward Fine-tuning
12 High/low Speed
13 One-key Flips & Rolls
14 One-key Calibration
Your drone is designed to be used with the “WiFi_CAM” app, available in both the App Store and Google Play Store. 1. Search for “WiFi_CAM” in the App Store or Google Play Store. 2. Or scan the below QR Code to be sent directly to the app listing

1. Power ON your drone until you see a flashing LED. This signals that the drone is waiting for a connection from your mobile phone.
2. Go to your phone’s settings and first turn OFF mobile data while connecting to the drone.
3. Next go to your WiFi Settings and select the network called: “WIFI_4k_A17D97”
4. Once connected, open the “WiFi_Cam” app and tap the “START” icon to enter the control interface
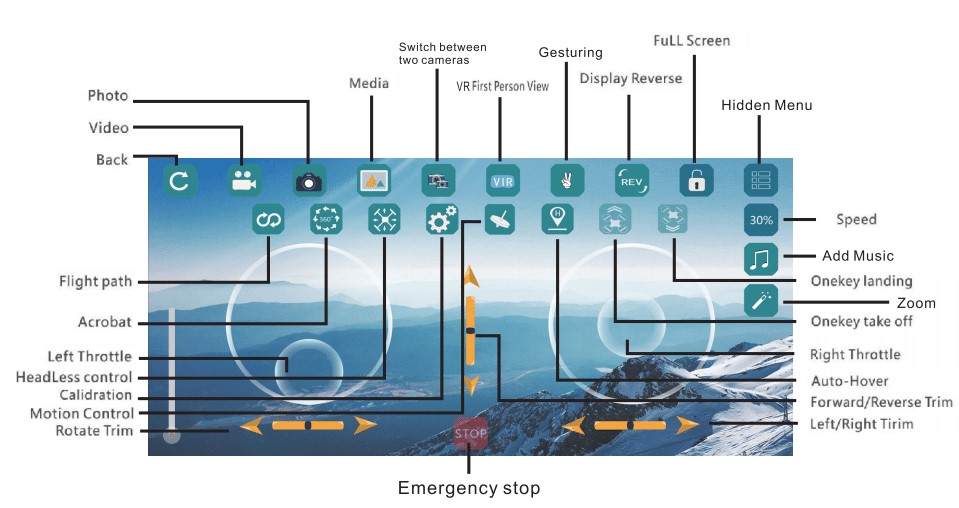
From the app, you will be able to take photos and videos with ease!
Tap the photo button (still camera icon) to bring up the camera interface. From here it will look familiar to taking photos from your native camera app, except now you’ll be using the streaming images from your drone! To take videos, tap the video button (video camera icon) to bring up the video interface. Again, this will look familiar to taking videos on your native camera app. The live view from your drone will be streaming back to your phone in real-time, and the videos will be saved to your mobile device. Houston, we have lift off! It takes a little practice to get good at flying a drone; but ours is especially easy to get the hang of, so you’ll be a pro in no time! If ever you find that you need our assistance, drop us an line on our 24/7 email: [email protected]